The Complete Guide to Homestead Food Preservation: Canning, Fermenting & Dehydrating
Homestead food preservation guide is one of the most common questions for anyone starting their self-sufficiency journey.
Food preservation isn’t a hobby — it’s the backbone of homestead self-sufficiency. When you preserve food, you close the loop between your garden and your table, extending the harvest through winter, reducing waste, and building a pantry that can carry your family through disruption of any kind. This is one of the oldest human skills, refined over generations, and it’s experiencing a powerful revival among modern homesteaders. Understanding homestead food preservation guide helps you make better decisions.
Whether you’ve a backyard garden overflowing in August, a relationship with a local farm, or simply a desire to buy seasonal produce in bulk and make it last — this guide covers every major preservation method you need to know. From water bath canning to wild fermentation to root cellaring, you’ll find practical, tested instruction here.
Why Learn Food Preservation?
Modern refrigeration is convenient, but it’s also fragile. A power outage lasting more than a few days can wipe out hundreds of dollars in food. Supply chain disruptions — which have become more common in recent years — can empty grocery store shelves within days. And even without dramatic emergencies, the simple economic reality is that preserved food costs a fraction of what commercial alternatives cost.
Beyond economics and resilience, there’s the quality argument. A jar of tomato sauce made from your garden tomatoes at peak ripeness, preserved in August and opened in January, tastes nothing like anything available in a store. Lacto-fermented vegetables contain live cultures that support gut health. Dehydrated herbs retain their essential oils in ways that commercial spices often don’t.
The skills stack on each other. Once you understand the principles behind water bath canning, pressure canning becomes approachable. Once you’ve made your first batch of sauerkraut, kombucha and sourdough feel natural. Each method you learn expands your capabilities significantly.
The Core Preservation Methods
- Water bath canning: Heat-based preservation for high-acid foods. Shelf-stable for 1–5+ years.
- Pressure canning: Higher-temperature processing for low-acid foods. Required for vegetables, meats, and legumes.
- Lacto-fermentation: Salt-based preservation using beneficial bacteria. No special equipment needed.
- Dehydrating: Removes moisture to prevent spoilage. Lightweight, shelf-stable, versatile.
- Root cellaring and cold storage: Controlled cool environments extend fresh food life for months.
- Freezing: Fast and accessible, but energy-dependent. Best for short-to-medium term storage.
- Smoking and curing: Traditional methods for meats and fish with excellent flavor results.
Getting Started: Water Bath Canning
Water bath canning is the entry point for most home food preservers, and for good reason. The equipment is inexpensive, the technique is straightforward, and the range of foods you can preserve this way is extensive: jams, jellies, tomato products, pickles, fruit preserves, pie fillings, and more. This is an important consideration when thinking about homestead food preservation guide.
How It Works
Water bath canning works by submerging sealed jars in boiling water (212°F at sea level) for a specified amount of time. The heat destroys molds, yeasts, and many bacteria. The boiling process also drives air out of the jar as steam, creating a vacuum seal as the jar cools. This sealed, oxygen-free environment prevents spoilage.
Critical safety note: Water bath canning is only safe for high-acid foods (pH 4.6 or below). Acid prevents the growth of Clostridium botulinum, the bacteria responsible for botulism. Foods that are naturally high-acid include most fruits, tomatoes (with added acid), and properly acidified pickles. If you’re uncertain about acidity, use tested recipes from the USDA, Ball Blue Book, or the National Center for Home Food Preservation.
Equipment You Need
- Large stockpot with lid (at least 3 inches deeper than your jars)
- Canning rack (keeps jars off the bottom)
- Mason jars, lids, and bands
- Jar lifter
- Wide-mouth funnel
- Bubble remover/headspace tool
- Kitchen timer
Basic Process
- Sterilize or wash jars in hot soapy water. Keep warm until filling.
- Prepare your food according to a tested recipe.
- Fill jars leaving the specified headspace (usually ¼ to ½ inch).
- Remove air bubbles by running a thin spatula around the inside.
- Wipe jar rims clean with a damp cloth.
- Apply lids and bands (finger-tight only).
- Lower jars into boiling water bath; water must cover jars by at least 1 inch.
- Process for the recipe’s specified time.
- Remove jars and cool undisturbed for 12–24 hours.
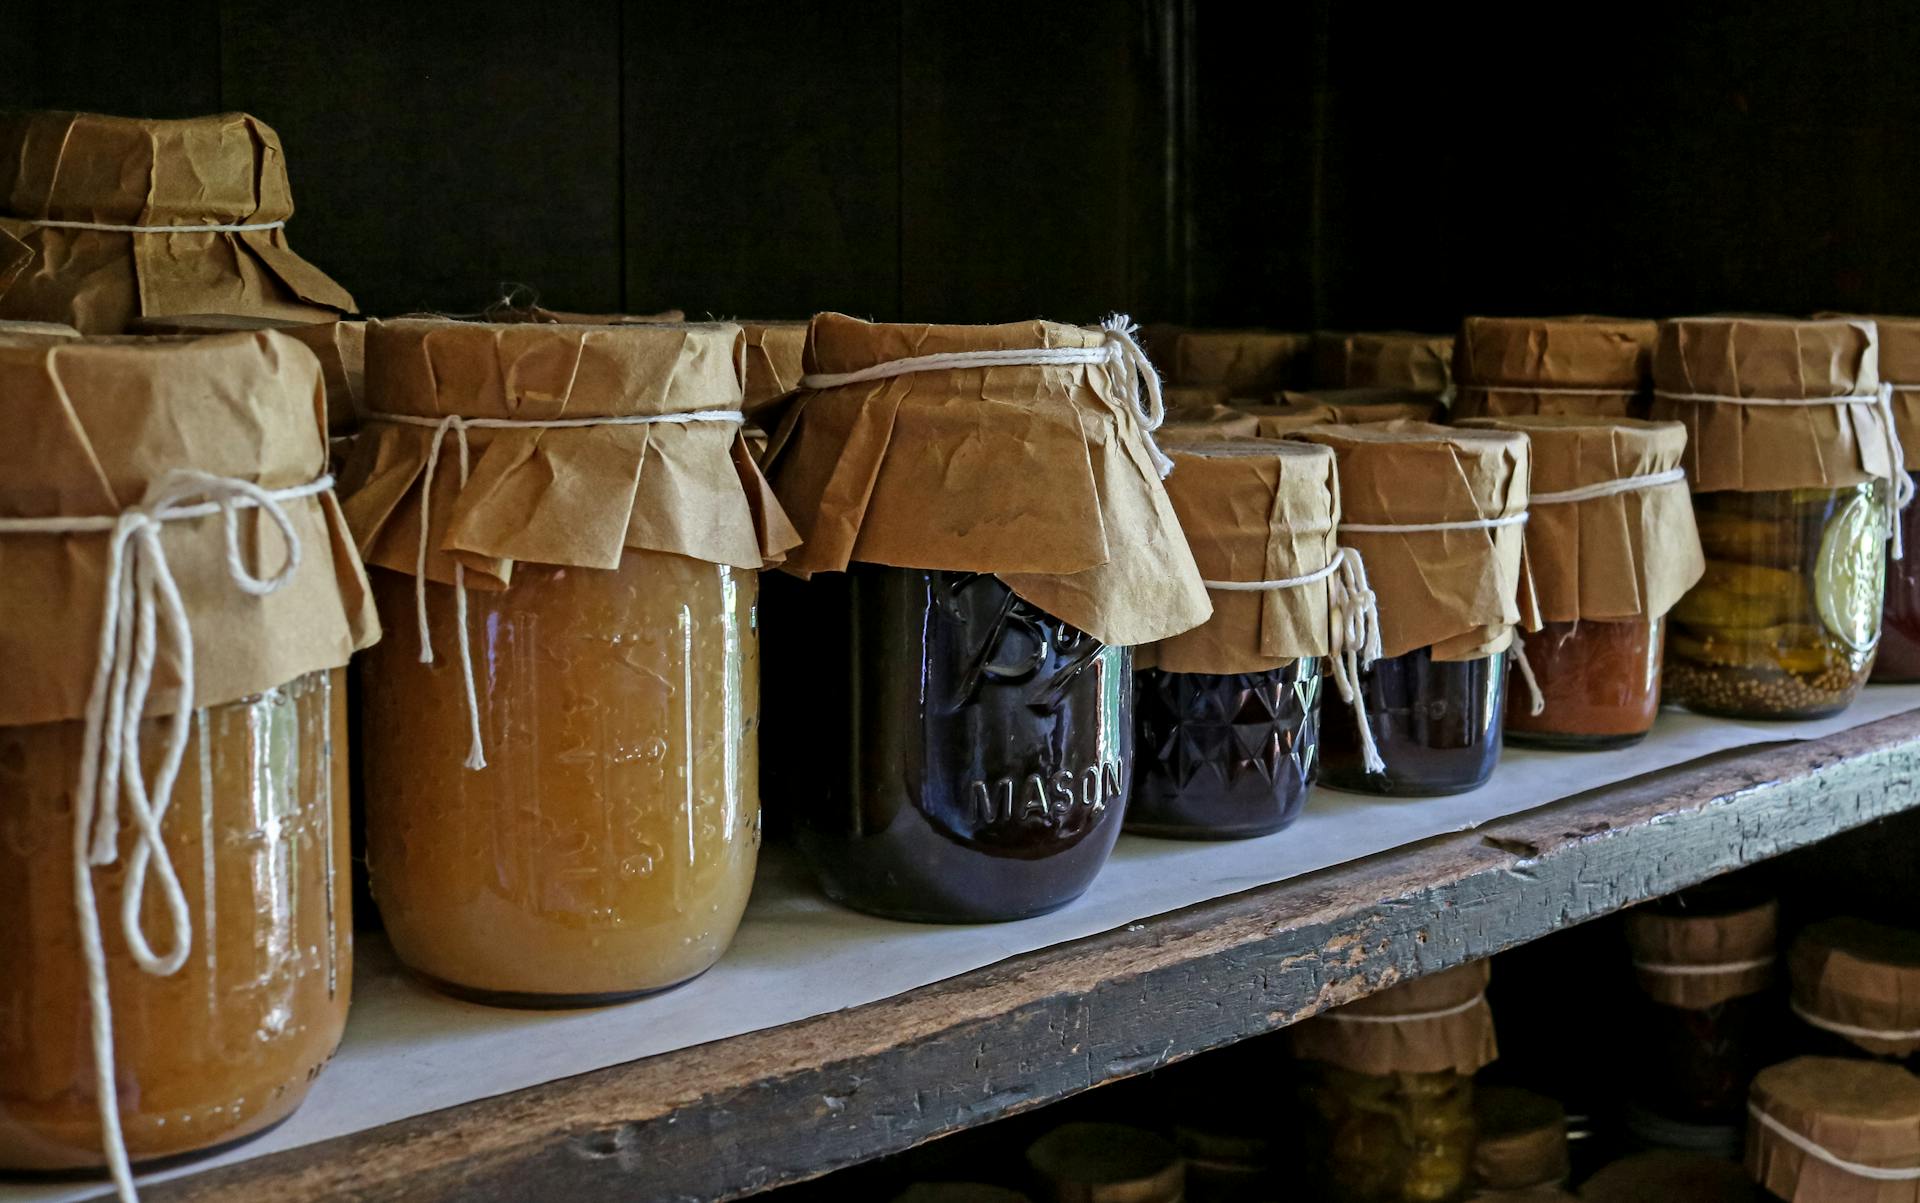
- Check seals. Store sealed jars in a cool, dark location for up to 18 months (best quality).
Good First Projects
- Strawberry jam (simple, forgiving, beloved)
- Bread and butter pickles (great use for garden cucumbers)
- Tomato sauce (garden staple)
- Apple butter (uses abundance of fall apples)
Pressure Canning: For Low-Acid Foods
Pressure canning is required for all low-acid foods: vegetables, meats, poultry, fish, dried beans, and soups. Low-acid foods can’t be safely preserved in a water bath canner because boiling water (212°F) isn’t hot enough to destroy Clostridium botulinum spores in a low-acid environment. A pressure canner achieves temperatures of 240°F, which does destroy these spores.
Don’t let pressure canning intimidate you. Modern pressure canners are well-engineered, equipped with safety valves, and straightforward to operate once you understand the process.
Equipment
You’ll need a dedicated pressure canner — not a pressure cooker. These are larger vessels (16–23 quarts typically) with a locking lid, a pressure gauge or weighted gauge, and a vent pipe. Quality brands include All American (no gasket required) and Presto (less expensive, requires periodic gasket replacement). This directly impacts your approach to homestead food preservation guide.
Basic Process
- Prepare food according to a tested recipe. Pack into jars with appropriate headspace (usually 1 inch for vegetables).
- Add water to canner per manufacturer instructions (typically 2–3 inches).
- Load jars, lock lid, and heat over medium-high heat.
- Vent steam for 10 minutes before closing petcock or setting weight.
- Allow pressure to rise to the target level specified in your recipe (10–15 PSI depending on altitude).
- Maintain steady pressure for the processing time (varies widely by food and jar size).
- Turn off heat and allow canner to depressurize naturally — don’t rush this step.
- Remove jars and cool for 12–24 hours without disturbing.
Good First Projects
- Green beans (a garden staple)
- Bone broth (rich and useful year-round)
- Chicken pieces (makes meal prep extremely fast in winter)
- Dried beans (pressure-canning beans saves enormous cooking time later)
Lacto-Fermentation: Simple and No Special Equipment Needed
Lacto-fermentation is arguably the oldest food preservation method in human history, and it requires nothing more than vegetables, salt, and a jar. The process harnesses naturally occurring lactobacillus bacteria — present on all fresh vegetables — which convert sugars into lactic acid in an anaerobic (oxygen-free) environment. The resulting lactic acid preserves the food and gives fermented vegetables their characteristic tangy flavor.
Unlike canning, fermentation doesn’t require heat, which means heat-sensitive nutrients and enzymes are preserved. Fermented vegetables are often more nutritious than their fresh counterparts because fermentation increases bioavailability of vitamins and minerals, and introduces beneficial probiotic bacteria.
How Lacto-Fermentation Works
Elegant in its simplicity, the process works like this:
- Chop or shred vegetables.
- Add salt (typically 2% by weight — 20g salt per 1kg vegetables).
- Massage the vegetables to release their liquid, or add a brine.
- Pack tightly into a jar so vegetables are submerged under liquid.
- Weight or cover to keep vegetables below the brine line.
- Leave at room temperature for 3–7 days (or longer for more sour flavor).
- Taste periodically. When the flavor is right, transfer to the refrigerator to slow fermentation.
Essential Fermented Foods to Try
- Sauerkraut: Shredded cabbage fermented in salt brine. The classic entry point. Stores refrigerated for months.
- Kimchi: Korean-style fermented cabbage with ginger, garlic, and peppers. More complex but still beginner-friendly.
- Fermented pickles: Cucumbers in salt brine. Completely different from vinegar pickles — crunchy, probiotic, delicious.
- Fermented hot sauce: Blended peppers fermented before adding vinegar. Deeply flavorful and shelf-stable.
- Sourdough starter: A living culture of wild yeast and bacteria that leavens bread without commercial yeast. One of the most accessible fermentation projects for any kitchen — flour, water, and a jar are all it takes. Full guide: How to Make a Sourdough Starter from Scratch.
Dehydrating Food at Home
Dehydration removes moisture from food, which prevents the growth of bacteria, molds, and yeasts. Properly dehydrated food is shelf-stable for months to years, extremely lightweight (important for bug-out bags and trail food), and retains most of its nutritional profile.
Equipment Options
- Food dehydrator: The best choice for consistent results. Electric dehydrators with adjustable temperature (95°F–165°F) and stacked trays are reliable and affordable. The Cosori and Excalibur brands are well-regarded.
- Oven: Works reasonably well at its lowest temperature setting with the door cracked for airflow. Less efficient than a dehydrator but accessible if you don’t have one yet.
- Solar dehydrator: A passive solar design that uses the sun’s heat to dry food. DIY-friendly for homesteaders and costs nothing to operate.
What Dehydrates Well
- Fruits: Apple slices, banana chips, mango strips, strawberries, blueberries. Many can be eaten as snacks or rehydrated for baking.
- Vegetables: Zucchini chips, tomato slices, mushrooms, bell peppers, kale chips. Excellent for soups and stews when rehydrated.
- Herbs: Basil, oregano, thyme, mint — far more flavorful when home-dried than store-bought.
- Meats: Beef jerky, turkey jerky. Use lean cuts and marinate well. Requires higher temperatures (165°F) for safety.
- Eggs: Scrambled eggs can be dehydrated and powdered for long-term storage. Incredibly useful for emergency preparedness.
Storage After Dehydrating
Moisture is the enemy of dehydrated food. Store in airtight containers (mason jars with oxygen absorbers, or vacuum-sealed bags) in a cool, dark location. Properly stored dehydrated vegetables last 1–4 years; fruits 1–2 years; meats 1–2 months at room temperature or up to a year refrigerated.
Root Cellaring and Cold Storage
Before refrigeration, nearly every homestead had a root cellar or cold storage area. These spaces use the earth’s natural insulation to maintain temperatures between 32°F and 50°F — cool enough to slow the metabolic processes that cause food to spoil, warm enough to prevent freezing damage. This directly impacts your approach to homestead food preservation guide.
You don’t need a traditional dug-out root cellar to benefit from cold storage principles. A cool basement corner, an unheated garage, or even a buried trash can (the “poor man’s root cellar”) can serve this function in many climates.
What Stores Well
- Root vegetables: Carrots, beets, turnips, parsnips, and celeriac store for 4–6 months in cool, humid conditions. Pack in damp sand or sawdust to maintain humidity.
- Potatoes: Need cool (40–50°F), dark, humid conditions. Avoid storing near apples (ethylene gas causes sprouting).
- Winter squash and pumpkins: Need cool (50–60°F) and dry conditions. Last 3–6 months.
- Onions and garlic: Need cool and dry (not humid) conditions. Braid garlic for traditional hanging storage.
- Apples and pears: Store well in cool, humid conditions. Wrap individually to prevent one rotten fruit from affecting others.
- Cabbage: The classic root cellar vegetable. Lasts months in near-freezing, humid conditions.
Temperature and Humidity Needs
Different foods prefer different conditions. Most root vegetables prefer cold (32–40°F) and humid (90–95% relative humidity). Winter squash and onions prefer cool but dry conditions. Understanding these differences — and being able to provide them with separate zones in your storage space — dramatically extends storage life.
Getting Started: Your First Preservation Project
The most common mistake people make with food preservation is trying to learn everything at once. Don’t. Pick one method. Master it. Then add another.
Recommended Starting Path
- Start with lacto-fermentation — make a jar of sauerkraut. It costs almost nothing, requires no special equipment, and produces results in 5–7 days. Building your confidence and understanding of anaerobic preservation principles comes naturally with practice.
- Move to water bath canning — make strawberry jam or simple pickles. Your first batch of jam, shimmering in labeled jars on a shelf you built yourself, is one of the most satisfying homestead moments there’s.
- Add dehydrating — dry herbs from your garden first. This is the gentlest entry point into dehydration, and the results are immediately useful.
- Tackle pressure canning — start with green beans or broth. Once you’re comfortable with the equipment, the process becomes routine.
Essential Resources
- Ball Blue Book of Canning and Preserving: The standard reference. Updated regularly with tested, safe recipes.
- NCHFP (nchfp.uga.edu): The National Center for Home Food Preservation — the authoritative online source for scientifically tested canning guidelines.
- Wild Fermentation by Sandor Katz: The definitive text on fermentation of all kinds.
- Root Cellaring by Mike and Nancy Bubel: The classic reference for cold storage of every type of food.
Conclusion
Food preservation is where the homestead harvest becomes homestead abundance. Every jar sealed, every batch of kraut bubbling on your counter, every dehydrator tray loaded with garden herbs represents a step away from dependence and toward genuine self-sufficiency.
These skills compound. Your second year of canning is easier than your first. Your fifth year of fermenting yields flavors your first batches never could. The knowledge becomes embodied — you develop intuition for what’s ready, what needs more time, what combinations work. That kind of deep knowledge is one of the most valuable things a homesteader can build.
Related posts and resources:
- Survival Prepping for Homesteaders: The Complete Family Preparedness Guide
- Urban Homesteading: The Complete Guide for City and Suburban Dwellers
- Family Emergency Preparedness Guide for Homesteaders
- Old-Fashioned Jelly Recipes: 5 Tested Recipes with Canning Instructions
- The 90-Day Pantry Course: Build Your Food Storage from Scratch
Start Your Homestead — Even From an Apartment
Container gardening, water storage, understanding land, raising your first animals. Practical steps you can take this month, wherever you live.