DIY Rabbit Hutch Plans for Meat Rabbits: Build Your Own
DIY Rabbit Hutch Plans for Meat Rabbits: Build Your Own
One of the best things you can do for your homestead rabbit operation is build your own hutches. DIY rabbit hutch plans for meat rabbits let you build exactly what you need — the right dimensions for your breed, the right number of bays for your doe count, and construction quality that far exceeds most pre-made hutches in the same price range. A well-built DIY hutch can last 8–10 years with basic maintenance. A budget hutch from an online retailer often lasts 2–3. This guide walks you through the planning process, the key design decisions, a materials list, and where to find free and paid plans that homesteaders actually use.
Why DIY Makes Sense for Homestead Rabbit Operations
Pre-made rabbit hutches are designed for the average pet owner. They’re sized for compact spaces, built with lighter materials to reduce shipping costs, and priced competitively — which usually means corners are cut somewhere. For a homestead where your rabbits are producing litters every 8–10 weeks and living outdoors year-round, those compromises matter.
Building your own hutch gives you:
- Correct sizing for your specific breeds (meat rabbits need more space than the average commercial hutch provides)
- Better materials — you choose the cedar, the wire gauge, the hardware
- Modular design that can expand as your operation grows
- Easier cleaning through intentional design (removable trays, full-access doors)
- Lower cost at comparable quality — typically $150–$250 in materials vs. $300–$450 for an equivalent commercial hutch
Even if you’ve never built anything more complex than a bookshelf, a rabbit hutch is an achievable first construction project. The tools required are minimal: a circular saw or handsaw, drill/driver, staple gun, and basic measuring tools.
Sizing for Meat Rabbits: Get This Right First
Before you look at any plans, know your dimensions. Meat rabbit breeds need more space than pet breeds, and does with litters need even more. Here are the standards used by experienced meat rabbit producers:
- Buck cage: 30″×30″×18″ minimum; 36″×30″ is better
- Doe cage (without litter): 36″×30″×18″ minimum
- Doe cage (with litter): 48″×30″×18″ — nest box needs room alongside the doe and kits
- Grow-out cage (8 fryers to slaughter weight): 48″×30″×18″ or larger
The American Rabbit Breeders Association recommends minimums on their standards page, but experienced producers consistently report better breeding outcomes when does have 48″×30″ floor space or more. Kits that overcrowd the nest box suffer higher mortality.
If you’re starting with 2 does and 1 buck, build for 3–4 bays minimum. You’ll need at least one grow-out cage per litter, so with 2 does kindling alternately, you need 2 doe cages, 1 buck cage, and 2 grow-out cages — 5 bays total to start.
Two Main Hutch Designs for Homesteaders
Traditional Outdoor Hutch (Wood Frame + Wire)
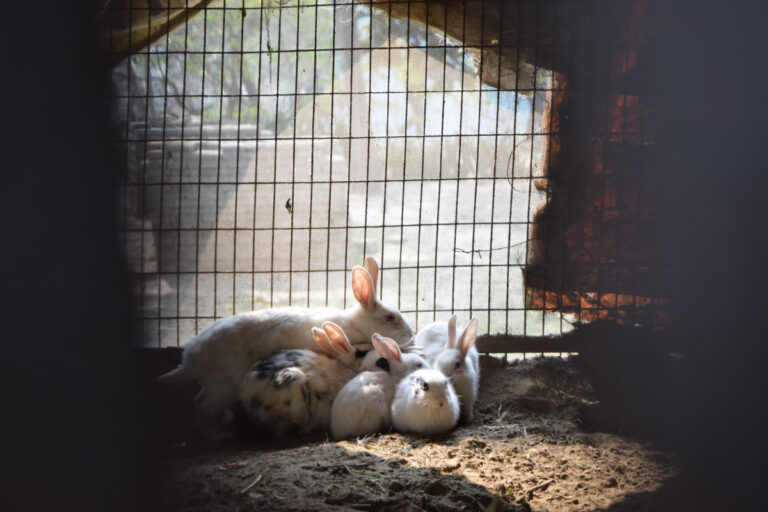
This is the classic design: a wood-framed structure with wire floors and sides, a solid wood sleeping/nest box area at one end, and a solid weatherproof roof. These hutches sit on legs, are often 2–4 bays wide, and hold each rabbit in its own section. They work well outdoors in most climates and are the easiest to build from basic plans.
Key design features to include:
- Legs at least 18″ off the ground for air circulation and predator resistance
- Wire floors (14 or 16-gauge 1″×½” or ½”×1″ galvanized mesh) for waste management
- Solid plywood or solid-board sleeping area at one end of each bay
- Removable drop trays under the wire floor (sheet metal or plastic trays)
- Asphalt-shingled or metal roof with 4″ overhang on all sides
- Individual access doors per bay with barrel bolt latches
Hanging Wire Cage System
Used inside a barn, garage, or covered shed, hanging wire cages are the most practical option for a larger operation. Individual wire cages (typically 30″×36″×18″ for does) hang from a ceiling or wall-mounted frame. There’s no wood floor to rot, cleaning is fast, and the system is infinitely expandable. Hanging cages require a covered outbuilding but otherwise excel in ease of maintenance. Commercial J-clips and a J-clip pliers tool are used to assemble wire cage panels without welding.
Materials List for a 3-Bay Outdoor Hutch
This list builds a 3-bay hutch approximately 9’×30″×48″ (length × depth × height), suitable for 3 individual rabbits — adjust bays to your needs:
- 8 pieces 2″×4″×8′ (cedar or pressure-treated for ground-contact frame members only)
- 4 pieces 2″×2″×8′ (for interior dividers)
- 1 sheet 4’×8′ ¾” exterior-grade plywood (for sleeping areas and back wall)
- 25 linear feet 1″×6″ cedar board (for siding on solid sections)
- 25 sq ft 16-gauge 1″×2″ galvanized welded wire mesh (for wire sides and front)
- 10 sq ft 14-gauge ½”×1″ galvanized mesh (for wire floors)
- 3 removable drop trays — sheet metal or galvanized steel drip trays (at least 30″×36″ each)
- 1 roll asphalt shingles or 1 sheet corrugated metal roofing
- 3 barrel bolt latches and 3 hinges for access doors
- 2 lbs 1½” exterior screws; 1 box ¾” heavy-duty staples
- Staple gun; circular saw; drill/driver
Total materials cost: approximately $150–$220, depending on lumber prices in your region.
Free and Paid Plan Resources
You don’t need to design your hutch from scratch. Here are reliable sources for rabbit hutch plans that homesteaders actually use:
- Teal Stone Homestead — Publishes detailed grow-out hutch plans specifically designed for meat rabbit production, including a 22-page PDF with cut charts and assembly instructions
- My Casual Homestead — Offers free cold-weather rabbit hutch plans designed for year-round outdoor use, with 2’×4′ insulated bay dimensions
- Instructables — Features step-by-step 6′ sectional hutch plans with photos at every stage
- Etsy — Search “rabbit hutch plans PDF” for inexpensive ($5–$15) downloadable plans with complete materials lists and professional drawings
Before choosing a plan, verify that the finished dimensions meet the sizing minimums listed above. Many plans circulating online were designed for pet rabbits and are undersized for a homestead meat operation.
Before you buy, read our complete rabbit hutch buying guide for beginners.
If you’re deciding which animal to start with, our complete guide to raising animals on a homestead walks through your best options as a beginner.
Related Reading
Frequently Asked Questions About DIY Rabbit Hutch Plans
What’s the best wood for building a rabbit hutch?
Cedar is the top choice for outdoor rabbit hutches because it naturally resists moisture, insects, and rot without chemical treatment. Kiln-dried Douglas fir is a good second option and is more widely available at lumber yards. Avoid pressure-treated lumber on any surfaces where rabbits can chew — the chemicals used in pressure treatment are toxic to rabbits. Seal all exterior wood surfaces with a non-toxic stain or sealant to extend the life of your hutch.
How long does it take to build a rabbit hutch?
A basic 2–3 bay outdoor hutch takes most builders one full weekend — about 8–12 hours total. Having a helper makes the frame assembly significantly easier, especially when squaring up the structure. A more complex hutch with multiple levels or an attached run can take 2–3 weekends. Preparation matters: cut all lumber to length before you start assembly, and have all hardware on hand before you begin. Stopping to make hardware store runs adds hours.
What wire should I use for rabbit hutch floors?
Use 14 or 16-gauge galvanized welded wire mesh with ½”×1″ openings for hutch floors. This gauge is strong enough to support a large rabbit without sagging, and the opening size allows waste to fall through while preventing feet from getting stuck. Don’t use chicken wire for floors — the hexagonal openings can trap rabbit toes and lead to injury. Add stress pads (small pieces of solid wood or tile) in the corners of each bay so rabbits can occasionally stand on a solid surface and reduce pressure on their feet.
How do I make a rabbit hutch easy to clean?
Design for cleaning from the start. Include removable drop trays under each wire floor section — slide them out, scrape into a compost bucket, rinse, and replace. Make access doors large enough to reach all corners of each bay. Avoid raw wood floors (use wire or line with removable rubber mats). Elevate the hutch at least 18″ off the ground so you can clean under it without crouching. Hutches designed with these features can be fully cleaned in under 10 minutes per bay.
Can I build a rabbit hutch with an attached run?
Yes — this is the ideal setup for homestead rabbits. Build the hutch first, then construct a fully enclosed run that attaches at one end or side with a pass-through door. The run should be at least 4’×8′ for medium breeds, fully enclosed on all six sides with 16-gauge welded wire, and have the wire skirt buried 6″ underground to prevent predator digging. A well-built hutch-and-run system takes a weekend each to build separately, or 2–3 weekends as a combined project.
Start Building the Right Way
Building your own rabbit hutch is one of the most satisfying projects on a homestead — and one of the most practical. When you build to the right dimensions with the right materials, you create a facility that serves your operation for years with minimal maintenance. Use the resources and materials list in this guide as your starting point, choose plans that match your breed and operation size, and build it once the right way.
For everything else you need to know about building a productive backyard homestead, visit thehomesteadmovement.com/start-here/.
Start Your Homestead — Even From an Apartment
Container gardening, water storage, understanding land, raising your first animals. Practical steps you can take this month, wherever you live.
Turn Your Homestead Into a Paycheck
Twelve income streams working homesteaders use to cover the mortgage and then some. Free PDF — real numbers, not pipe dreams.